Displaying a flag outside your home is a great way to show pride and add character to your space. To do it right, you need to know how to anchor a flag bracket securely into the siding. A strong installation not only keeps your flag steady but also protects your siding from damage.
 Start by choosing the perfect spot on your siding and marking where the screws will go. Use a drill and weather-resistant screws to ensure a firm and lasting hold. These steps help anchor your flag bracket securely, keeping it in place during wind or rain while maintaining the integrity of your siding.
If you’re ready to display your flag with confidence, now’s the time to learn how to anchor a flag bracket into siding. Follow these simple steps, and you’ll have a safe, durable siding installation in North Richland Hills, TX, that enhances your home. Gather your tools, and let’s get started on this quick and rewarding project!
 Before you begin, gather the following tools and materials:
 Vinyl siding is a popular choice for many homeowners due to its low maintenance and durability. When anchoring a flag bracket into vinyl siding, it’s crucial to avoid over-tightening the screws, as this can cause the siding to crack or warp. Use plastic anchors or specialized vinyl siding screws designed for this material.
 For wood siding, you can typically drill pilot holes and secure the flag bracket directly into the wooden planks using appropriate screws. Ensure that the screws are long enough to penetrate the siding and into the wall studs for added strength.
 suitable for your siding material and follow the manufacturer’s instructions for the correct size. This step helps prevent cracks and ensures a stable attachment.
 Once the flag bracket is securely mounted, attach your flag or banner according to the manufacturer’s instructions. Double-check that everything is secure and positioned correctly. This final step completes the process, allowing you to proudly display your flag or banner.
 Start by choosing the perfect spot on your siding and marking where the screws will go. Use a drill and weather-resistant screws to ensure a firm and lasting hold. These steps help anchor your flag bracket securely, keeping it in place during wind or rain while maintaining the integrity of your siding.
If you’re ready to display your flag with confidence, now’s the time to learn how to anchor a flag bracket into siding. Follow these simple steps, and you’ll have a safe, durable siding installation in North Richland Hills, TX, that enhances your home. Gather your tools, and let’s get started on this quick and rewarding project!
Tools and materials needed for the job
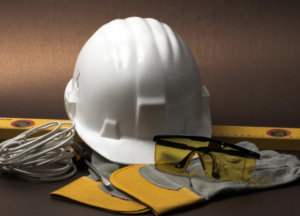 Before you begin, gather the following tools and materials:
- Flag bracket (with appropriate mounting hardware)
- Power drill
- Drill bits (appropriate for your siding material)
- Masonry bits (if anchoring into brick or concrete)
- Stud finder
- Level
- Pencil or marker
- Screws or anchors (compatible with your siding material)
- Caulk or sealant (optional, for weather protection)
- Safety gear (goggles, gloves, etc.)
Types of Siding That Ensure Secure Anchoring
Different types of siding require different anchoring methods. Here’s a quick overview of common siding materials and the recommended anchoring techniques:Vinyl Siding
 Vinyl siding is a popular choice for many homeowners due to its low maintenance and durability. When anchoring a flag bracket into vinyl siding, it’s crucial to avoid over-tightening the screws, as this can cause the siding to crack or warp. Use plastic anchors or specialized vinyl siding screws designed for this material.
Wood Siding
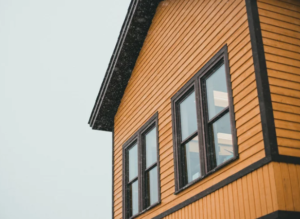 For wood siding, you can typically drill pilot holes and secure the flag bracket directly into the wooden planks using appropriate screws. Ensure that the screws are long enough to penetrate the siding and into the wall studs for added strength.
Brick or Masonry
For brick or masonry siding, use masonry anchors, screws, and a masonry drill bit. Anchoring into mortar joints ensures a solid hold. For expert siding repair in North Richland Hills, TX, trust professionals to handle the job safely and effectively for lasting results.Fiber Cement or Composite Siding
Fiber cement and composite siding materials require specialized anchors or screws designed for their specific composition. Follow the manufacturer’s recommendations for the appropriate fasteners and anchoring techniques.Simple Steps to Install a Flag Bracket on Siding
Locate the Studs
Use a stud finder to locate the wall studs behind your siding. Anchoring the flag bracket into the studs ensures extra support and stability. Studs provide a strong base, preventing the bracket from loosening over time and keeping your flag securely in place.Mark the Mounting Location
After finding the stud locations, use a pencil and level to mark where you want to mount the flag bracket. Ensuring the bracket is level and centered creates a professional appearance while helping maintain proper alignment during the installation process.Drill Pilot Holes
Drill pilot holes to make screw installation easier and avoid damaging the siding. Use a drill bit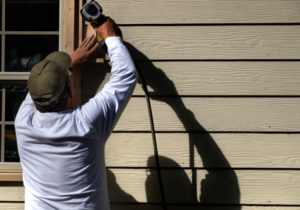 suitable for your siding material and follow the manufacturer’s instructions for the correct size. This step helps prevent cracks and ensures a stable attachment.
Install Anchors (if necessary)
If your siding requires anchors, such as plastic anchors for vinyl or masonry anchors for brick, insert them into the pre-drilled holes. Follow the manufacturer’s instructions to ensure a proper fit, providing additional support and stability for the flag bracket.Secure the Flag Bracket
Align the flag bracket with the pilot holes or anchors, then fasten it using appropriate screws. Tighten the screws securely but avoid over-tightening, which can damage the siding or misalign the bracket. This step ensures the bracket stays firmly in place.Apply Caulk or Sealant (optional)
For added protection, apply caulk or sealant around the edges of the flag bracket where it meets the siding. This step helps prevent water from seeping in and extends the life of your flag bracket installation in North Richland Hills, TX, especially in areas with harsh weather.Attach the Flag or Banner
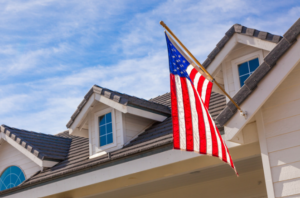 Once the flag bracket is securely mounted, attach your flag or banner according to the manufacturer’s instructions. Double-check that everything is secure and positioned correctly. This final step completes the process, allowing you to proudly display your flag or banner.