
Are you considering replacing a window on your brick home? I know it sounds a bit intimidating, but with the right tips and a bit of prep, it can be a super rewarding DIY project. In this guide, we’ll walk you through how to replace a window on a brick home, from picking the right type of window to handling the tricky parts.
Brick homes have that classic, timeless appeal, but old windows can start to show their age. They might get drafty, look outdated, or just not perform as well as they used to. Swapping them out not only boosts your home’s curb appeal but also makes it more energy-efficient and comfy.
Before we get into the nitty-gritty, let’s talk about why replacing windows on a brick home is such a big deal. New windows mean better insulation, which can lower your energy bills and reduce your carbon footprint. Plus, they can up your home’s value and make your living space way more pleasant. Ready to dive in? Let’s get started!
Different Types of Windows for Brick Homes
Casement Windows
Casement windows, designed to open outward with hinges on one side, offer door-like functionality. They are favored for their excellent ventilation capabilities and clear, unobstructed views.
Sliding Windows
Perfect for spaces where exterior protrusions are a concern, sliding windows move horizontally and are straightforward to operate, making them a practical choice for many homes.
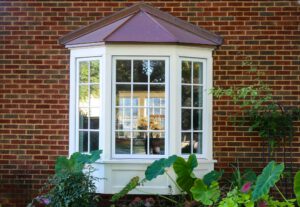
Bay or Bow Windows
Bay and bow windows project outward from the home’s wall, enhancing architectural interest and increasing interior space. They can transform the look and feel of a room by adding depth and light.
Awning Windows
These windows are hinged at the top and open outward, making them ideal for locations with frequent rainfall. Awning windows allow for ventilation even during wet weather.
Tools and Equipment Needed for Window Replacement on a Brick Home
Safety Equipment
Gloves
Protect your hands during manual work.
Goggles
Shield your eyes from dust and debris.
Dust Mask
Prevent inhalation of fine particles.
Removal Tools
Pry Bar
Essential for removing the old window frame.
Putty Knife
Helps in clearing old caulk and opening paint-sealed joints.
Hammer and Chisel
Useful for chipping away old mortar or parts of the brick if necessary.
Installation Tools
Utility Knife
For cutting shims, opening caulking tubes, and trimming materials.
Caulking Gun and Caulk
To seal the window and prevent air and water leaks.
Drill and Drill Bits
Necessary for making holes for anchors or screws.
Measuring and Leveling Tools
Level
To ensure the window is installed perfectly horizontal and vertical.
Tape Measure
For accurate measurement of the window and opening.
Shims
To adjust the positioning of the window for a perfect fit.
Fastening Tools
Screwdrivers (Flat and Phillips Head)
For driving screws into the frame and securing the window.
Additional Equipment
Ladder or Scaffolding
Needed if the window is above ground level.
Vacuum Cleaner or Shop Vac
To clean up after the installation process.
Step-by-step Guide on How to Remove an Old Window from a Brick Home
Step 1: Prepare the Work Area
Before beginning the removal process, it’s important to prepare your workspace. Clear any furniture or obstacles from the area around the window, both inside and outside your home. This step helps prevent any damage and creates a safer environment for the work to be carried out.
Step 2: Remove the Interior Trim
Start by carefully prying off the interior trim around the window. Use a pry bar and a putty knife to lift the trim away from the wall gently. It’s important to proceed with caution to avoid damaging the plaster or drywall around the window frame.
Step 3: Detach the Window from the Frame
With the trim removed, the next step involves detaching the window from its frame. This might involve unscrewing, pulling out nails, or removing any other fasteners that hold the window securely within the frame. Ensure each fastener is completely removed before proceeding to the next step.
Step 4: Pry the Window Out
Once all fasteners are removed, use a pry bar to remove the window from the opening gently. Care should be taken to avoid exerting too much force against the brickwork to prevent any damage. Slow and steady pressure will typically free the window from its position.
Step 5: Clean the Opening
After the window has been removed, it’s important to clean the opening thoroughly. Remove all debris, dust, and remnants of old caulking or sealant from the frame and brick edges. This ensures a clean, smooth surface for installing the new window.
Preparing the Brick Opening for the New Window Installation
Inspect the Brick Opening
Before proceeding with the installation, inspect the brick opening carefully for any signs of damage, deterioration, or other issues that may need to be addressed. This includes checking for cracks, loose mortar, or any other structural problems that could compromise the integrity of the opening. Identifying these issues early on will help prevent potential problems during the installation process.
Make Necessary Repairs
If you notice any issues with the brickwork, make the necessary repairs using appropriate materials and techniques. This may involve re-pointing the mortar, repairing cracks, or addressing any structural problems. It’s essential to address these issues before installing the new window to ensure a secure and watertight seal.
Measure the Opening
Accurate measurements are critical to ensure the new window fits properly in the opening. Measure the opening carefully, taking note of the width, height, and any obstructions that may affect the installation. Double-check your measurements before ordering the new window to avoid any potential issues during the installation process.
Install Flashing and Waterproofing
To prevent water intrusion and ensure proper drainage, apply appropriate flashing and waterproofing materials around the opening. This includes installing flashing around the window frame and applying waterproofing sealants to the joints and corners. Proper installation of flashing and waterproofing materials will help protect the brick home from water damage and ensure a long-lasting installation.
How to Install a New Window in a Brick Home
Review Manufacturer’s Instructions
Thoroughly review the installation instructions provided by the window manufacturer. These instructions will ensure you follow the proper steps for a successful and secure installation.
Apply Caulking
Apply a generous bead of high-quality caulking around the perimeter of the opening. This will create a weather-tight seal between the window and the brick, preventing air and water infiltration.
Insert the New Window
Carefully insert the new window into the opening, ensuring it is level and plumb. Double-check the measurements to confirm the window fits properly within the opening.
Secure the Window
Use the appropriate fasteners, such as screws, nails, or brackets, to securely attach the window to the brick opening. Follow the manufacturer’s recommendations for the type and placement of the fasteners.
Insulate and Seal
Apply insulation around the perimeter of the window to prevent air leaks and improve energy efficiency. Seal any remaining gaps with high-quality caulking or weatherstripping.
Install Interior Trim
Once the window is properly installed and sealed, install the interior trim to complete the finished look. The trim should seamlessly integrate the window with the surrounding wall.
Common Challenges During Window Replacement on a Brick Home
Uneven or Damaged Brickwork
If you encounter uneven or damaged brickwork during the replacement process, use shims or additional framing to create a level and sturdy opening for the new window. Ensuring a stable foundation for the window installation is crucial for its long-term performance.
Difficult Access
Some windows may be situated in hard-to-reach areas, making the installation process more challenging. To address this, consider using scaffolding or ladders to access these areas safely and ensure the proper installation of the new window.
Moisture Issues
Address any signs of moisture or water damage around the window opening before proceeding with the installation. Resolving moisture issues beforehand will prevent future problems and ensure the longevity of the new window installation.
Unexpected Obstacles
During the removal or installation process, unexpected obstacles like hidden wiring or structural issues may surface. Stay prepared to adapt and address these challenges promptly to ensure a smooth and successful window replacement project.
Hiring a professional vs. DIY window replacement on a brick home
DIY Window Replacement
Cost Savings
One of the primary advantages of DIY window replacement is the potential for cost savings. By handling the installation yourself, you avoid the labor costs associated with professional services.
Personal Achievement
Completing a window replacement on your own can offer a significant sense of accomplishment. There’s a unique satisfaction in knowing you’ve personally improved your home.
Skill Building
Engaging in a DIY window project allows you to acquire and hone new skills, making you more self-reliant in home maintenance tasks.
Hiring a Professional Window Installation Company
Expertise and Experience
Professional window installers bring a wealth of knowledge and experience to the table, essential for tackling complex challenges that may arise with brick homes.
Warranties and Guarantees
Most professional installation companies provide warranties and guarantees for their work. This added protection can give homeowners peace of mind, knowing that their investment is secure.
Efficiency and Time-Saving
Professionals can complete window installations more efficiently than the average DIY enthusiast, saving valuable time and minimizing disruption to your daily life.
Safety
Window installation involves risks, especially with the added complexity of working on brick structures. Professionals are equipped with the right tools and safety training to reduce the likelihood of accidents.
Conclusion
Replacing windows on a brick home can be a rewarding and transformative project. By following the steps outlined in this guide, you can ensure a successful installation that not only enhances the aesthetic appeal of your home but also improves energy efficiency and overall comfort.
Remember, proper preparation, attention to detail, and patience are key to a successful window replacement project. Don’t hesitate to get professional window replacement in North Texas help if you face challenges that are beyond your skill level or comfort zone.
With your new windows installed, you can sit back and enjoy the improved views, enhanced natural lighting, and increased energy savings that come with this home improvement project.
North Texas Home Exteriors offers the highest quality windows, sunrooms, siding, and exterior door replacement in this community while offering the best customer service in Keller, Southlake, Dallas, Fort Worth, TX.
Frequently Asked Questions
Can I replace the windows on a brick home myself?
While replacing windows on a brick home can be a DIY project, it requires careful planning, the right tools, and a certain level of skill. If you’re unsure about your abilities or the complexity of the project, it’s best to hire a professional window installation company.
How do I measure for a new window on a brick home?
Measuring for a new window on a brick home is crucial to ensure a proper fit. Measure the rough opening horizontally and vertically at several points, and use the smallest measurements to order the new window. It’s also important to consider the depth of the opening and any necessary adjustments.
What type of windows are best for a brick home?
The best type of windows for a brick home depends on various factors, such as architectural style, energy efficiency needs, and personal preferences. Some popular options include double-hung, casement, and sliding windows, as well as bay or bow windows for added character.
How do I ensure a proper seal and insulation around the new window?
To ensure a proper seal and insulation around the new window, use high-quality caulking and weatherstripping materials. Additionally, consider adding insulation around the window frame to prevent air leaks and improve energy efficiency.
How long does it typically take to replace a window on a brick home?
The time required to replace a window on a brick home can vary depending on the complexity of the project, the number of windows being replaced, and the experience of the installer. As a general guideline, a single window replacement can take anywhere from a few hours to a full day for a professional installation.