A fresh coat of paint can instantly transform your home and boost its value. But without proper preparation, you may face peeling, bubbling, or patchy finishes that waste time and money. If you are unsure how to prepare your home for a paint job, this step-by-step guide explains exactly what to do for long-lasting, professional-looking results.

We will walk you through every step to help you plan your project, protect your space, and avoid costly mistakes. Proper preparation makes all the difference, from gathering tools and cleaning surfaces to patching holes and covering furniture. Whether painting a bedroom or refreshing your home’s exterior, these tips will keep your project stress-free and on track.
How to Evaluate Your Home Before Starting a Paint Job
Before lifting a brush, figure out what needs painting and what condition your home is in. Knowing how to prepare your home for a paint job starts with a clear plan.
1. Decide What Needs Painting
Are you painting one room, a few spots, or the entire house inside and out? Each project type will need different preparation steps and more or less time.
2. Choose Between DIY or Hiring Help
Think about your skills, how much time you have, and your budget. Some jobs are fine for DIY, but others might need a professional.
3. Inspect Surfaces Closely
Walk through the space and look for chipped paint, grease, stains, water spots, or mold. Identify and note any trouble spots so you can repair them before painting.
4. Make a List of What to Paint
Write down every wall, door, or trim you plan to paint. This helps you stay organized and know how much paint and supplies you need.
5. Create a Realistic Timeline
Consider how long each task will take, especially if you work around kids, pets, or a busy schedule. Give yourself more time than you think.
Essential Tools and Supplies to Prepare Your Home for Painting
Use this painting preparation checklist to gather everything you need for a smooth and mess-free start:
- Use painter’s tape to protect trim, baseboards, and edges.
- Use fabric drop cloths or plastic covers to protect your floors and furniture from paint spills and dust.
- Sanding blocks or sandpaper are used to smooth rough or glossy surfaces.
- Use patching compound or spackle to fill in minor cracks and small holes on the surface.
- Caulk and caulking gun for sealing gaps around windows, doors, and trim.
- A putty knife is used to apply patching paste or scrape loose paint.
- A mild cleaning solution or degreaser is used to wash the walls before painting.
- Use buckets and sponges to rinse and wipe surfaces clean.
- Paintbrushes and rollers that match your paint type and surface texture.
- Use paint trays with liners to help apply paint evenly to your roller.
- Extension pole for painting ceilings or hard-to-reach spots.
- Use a ladder or step stool to reach high spots safely while painting.
- Safety gear like gloves, goggles, and a mask is important, especially when sanding or cleaning old surfaces.
The right preparation tools make the painting process easier, cleaner, and safer. They also help paint stick better and last longer.
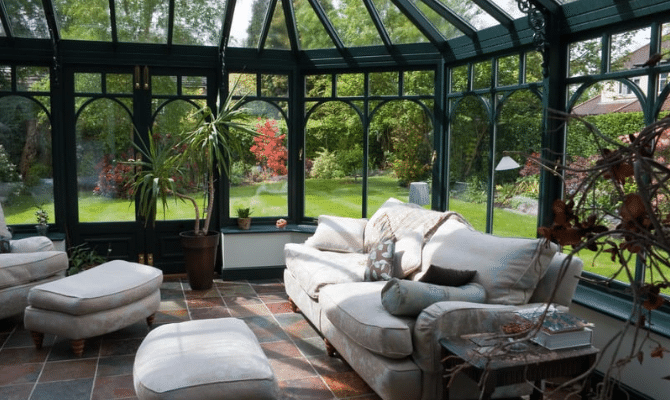
How to Prepare the Inside of Your Home for a Paint Job
Getting your interior ready is about more than just clearing space. It’s also about protecting what matters and creating a smooth surface for painting.

1. Move Furniture and Protect Your Belongings
Start by removing or shifting furniture away from the walls. Cover remaining items with plastic sheets or old blankets. Take down curtains, wall art, and outlet covers.
2. Clean Walls, Ceilings, and Trim Thoroughly
Paint adheres best to clean surfaces. Use mild soap and water to remove dust, grease, and cobwebs. Make sure surfaces are completely dry before starting the next step.
3. Patch Holes, Cracks, and Surface Imperfections
Apply spackle or wall filler to repair dents and holes. Sand patched areas until smooth and wipe away dust. Fill gaps in trim with caulk for a seamless look.
How to Get Your Home’s Exterior Ready for Painting
Knowing how to prepare your home for a paint job outdoors is critical for weather resistance and long-term curb appeal. These steps prevent paint failure and costly redos.
Power Wash and Scrape Old Paint
Wash the exterior walls using a power washer or hose with scrub brushes to remove dirt, mold, and loose paint. After the surface dries, scrape any peeling paint.
Caulk, Repair, and Prime Problem Areas
Fill exterior cracks with outdoor-rated caulk. Repair damaged siding or trim. Prime bare wood or repaired sections to ensure even paint absorption.
Protect Landscaping and Outdoor Fixtures
Cover bushes, flower beds, decks, and light fixtures with tarps or painter’s plastic. Secure coverings with tape or weights to prevent wind damage.
Environmental Tips to Prepare Your Home for Painting
Before painting, check the weather and indoor conditions. Aim for a dry day between 50 and 85 degrees for exterior painting with low humidity. For interior painting, open windows and use fans to improve ventilation and help the paint dry evenly without trapping fumes.
Avoid painting during extreme heat, cold, or high humidity. Direct sunlight can cause paint to dry too fast and blister, while humidity control is key in bathrooms, kitchens, or basements. Let your home settle into stable temperatures before you start so your paint sticks and lasts longer.
Final Preparation Checklist Before You Start Painting
Before picking up a brush, check to avoid missed spots or delays. This final preparation checklist helps you catch anything left out and makes your painting job go smoother.
- Ensure all walls are clean and dry with no dust, grease, or moisture.
- Check that holes and cracks are patched and all repairs are fully sanded.
- Wipe down surfaces after sanding to remove leftover dust before painting.
- Cover all furniture and flooring using plastic sheets or drop cloths.
- Use painter’s tape to protect baseboards, windows, switches, and trim.
- Open windows or turn on fans for better airflow and ventilation.
- Move anything that blocks access to walls, doors, or trim.
- Confirm that all painting supplies, like brushes, rollers, trays, and paint, are ready.
- Check corners, vents, and ceiling edges so nothing important is missed.
- Keep a step stool or ladder handy for reaching high or tight spots.
This quick walkthrough keeps you organized and prevents last-minute problems. Taking a few extra minutes now saves you hours later.
How to Choose the Right Paint Type and Finish for Your Home

Choosing the right paint goes beyond color. You must also consider the type of paint and finish that fits each room’s use and lighting.
1. Use Latex Paint for Most Walls
It dries fast, cleans easily, and works great for everyday rooms like bedrooms, hallways, and living areas.
2. Try Oil-Based Paint for Smooth Finishes
It gives a rich look and holds up well on trim, doors, or cabinets, but it takes longer to dry and has more odor.
3. Choose the Right Finish for Each Room
Glossy paint resists moisture, so it’s ideal for bathrooms and kitchens. Use matte or eggshell finishes in bedrooms and living rooms for a soft look.
4. Use Color to Shape the Space
Lighter shades can open up small rooms and make them feel bigger. Darker colors bring warmth and coziness to larger areas.
5. Test Paint Swatches First
Put up samples on the wall and check them in daylight and at night. Lighting can change how paint looks.
The right paint and finish can boost your home’s look and hold up better. Taking a few minutes to plan now saves work down the road.
Frequently Asked Questions
Should I Prime My Walls When Preparing for a Paint Job?
Yes, primer is essential if you cover stains, patch areas, or switch from dark to light colors. It helps paint stick better, improves coverage, and makes the color look more even and vibrant across the whole surface.
Can I Paint Without Sanding the Old Paint Off?
You can skip sanding if the wall is clean, dry, and smooth. But sanding is necessary for shiny, chipped, or uneven surfaces to help the new paint stick better and prevent it from peeling or flaking later.
How Do I Protect My Furniture and Floors When Painting Indoors?
Move furniture out of the room. If not, cover it with plastic or drop cloths. Use painter’s tape on the trim and baseboards. Lay canvas or plastic sheets on the floor to protect it from spills or drips.
What Happens If I Don’t Properly Prepare My Home Before Painting?
Skipping prep can lead to streaks, uneven color, peeling, or poor adhesion. Paint applied over dirt, grease, or moisture tends to break down more quickly over time. Proper prep saves time and money and keeps your walls looking great for longer.
Conclusion
Knowing how to prepare your home for a paint job is the first step to getting clean lines, smooth walls, and long-lasting results. Good prep cuts down on stress and prevents common paint problems. If you’re planning a project, now’s the perfect time to get it right.
At North Texas Home Exteriors, we make painting easy from start to finish. Whether you need expert advice, high-quality prep work, or full-service painting, our team is ready to help. We take pride in transforming homes with clean finishes and trusted craftsmanship you can count on.
Ready to see what a flawless paint job can do for your home? Contact us now or get a no-obligation quote today. Let North Texas Home Exteriors turn your next paint project into something you love coming home to daily. We’re here to make it smooth, simple, and beautiful.
End Note
North Texas Home Exteriors is your go-to partner if you’re looking for expert help preparing your home for a paint job. From detailed preparation work to smooth, flawless finishes, our painting services are built around quality, care, and long-lasting results. Whether you’re updating one room or refreshing your entire exterior, we will walk you through each step and make sure it’s done right the first time.
We offer a full range of home improvement services, including window replacement, custom windows, shade structures, siding installation, and doors to boost comfort and curb appeal. No matter the size of your project, we serve families across the region with reliable service and clear communication. See our full areas-we-services to find out if we are near you.
Want to know more about who we are? Visit our About Us page, browse the Blog for helpful tips, or connect with us on Facebook and Instagram for more updates. You can also see where we are listed on the Find Us Online page or reach out directly through our Contact Us page. We’re here to make your home improvement journey simple, stress-free, and successful.
North Texas Home Exteriors
7901 Whispering Woods Ln, North Richland Hills, TX 76182, United States
+18172016800